
We’ve talked about pie crust before, you and I.
I thought today might be a good day for a little refresher. The breeze outside is mighty fine, the sun seems pretty friendly, I’ve got chilled butter in the fridge, and… tomorrow I want to show you how to make a double crusted berry pie… so let’s nail this pie crust first.
Can we do this? Of course we can. I’ll talk you through it and leave hella directions for you to print out. Yes, hella. High five.

Any respectable pie crust has butter. Lots of butter. Lots of cold cold cold butter.

I’ve cut up our two sticks of cold butter into cold cubes and tossed them with the dry ingredients.

Next… dump the whole dang thing on the tabletop. The whole dang thing. Don’t be scared. We’re in this together.

Bust out that rolling pin. I use the rolling pin to flatten out the cold butter cubes and incorporate them into the dry ingredients. Some people use their fingers. Some people use a pastry cutter. Other people use a food processor. Sure… but that’s not what we’re talking about here.

Roll the loose dry ingredients and the cold butter, using your hands or a bench knife to pile up the mixture and roll it out again. The goal here is to make flattened sheets of cold butter within the flour mixture.

Like this! I’ve put it all back in the bowl. I used my hands to do this. I also made a little well in the center of the butter and flour mixture. That’s where I’m going to pour in the cold buttermilk. Mmmm.

Believe it or not this is the dough after I’ve added the cold buttermilk. But it’s so shaggy!? Yes… yes it is. It’ll all come together. It just needs a good pressing together and an hour long rest in the refrigerator.

I’ve divided the dough into two rough balls.

Wrap the balls in waxed paper and place in the fridge for at least an hour. Resting the dough like this is super important. It helps the butter re-chill which is important when it comes to rolling out and baking the dough aaand the rest helps the liquid incorporate properly into the dough.

Chilled dough disk on a well floured surface just before the rolling out process. I’ll sprinkle flour on top too before I attack this thing with the rolling pin.

Rolled out.

Panned up and trimmed.

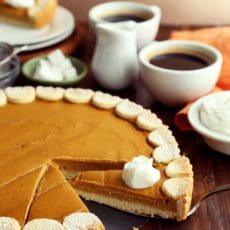
This particular pie crust was for an Apple Pie.

Once the top crust is rolled out and placed over the filling, trim the excess dough so that there’s about 1/2 to 1-inch of extra crust.

Pinch the extra dough together with your fingers or with the tines of a fork. Make a pretty pattern.
Not so bad… right? Tomorrow we throw berries in the mix. Prepare.
Buttermilk Pie Crust
makes a double crusted 9-inch pie crust
2 sticks (8 ounces) cold unsalted butter
2 1/2 (12 ounces) cups all purpose flour
1 Tablespoon sugar
1 teaspoon salt
1/2 cup (5 to 6 ounces) buttermilk
1. Cut the butter into 1-inch pieces and place in the freezer to chill for 15 minutes. Measure out the buttermilk and store in the refrigerator to keep it cold (you could even put it in the freezer for a few minutes too).
2. Sift together the flour, sugar and salt in a large bowl. Take the cold butter from the freezer and toss it with the flour mixture.
3. Dump the cold butter cubes and flour mixture onto a large work area for rolling. With a rolling pin, roll the mixture, flattening the butter cubes with the flour into long, thin, floured butter sheets. Work quickly to ensure that the butter stays cold. Below is what the rolled butter and flour look like after I’
ve gathered them together on the work surface a bit.
4. Place the flour and flattened butter back in the large bowl and chill for 10 minutes. When the butter is cold, remove the bowl from the refrigerator, make a small well in the center of the flour and butter mixture. Add the cold buttermilk to the bowl all at once. Begin to bring the dough together with one hand ( keep the other hand free to answer the phone). Moisten all of the flour with the milk, using your hand to break up large clumps of milk and flour. The dough will be rather shaggy, but you can add another tablespoon of buttermilk, if you see that all your flour isn’t moistened. Form the dough into two disks. The disks will be rough, and hard to shape together, but once they rest in the fridge for an hour, they’
ll be easier to roll out.
5. Chill the dough for at least an hour in the refrigerator. At this point, the dough will keep in the fridge for up to three days, or in the freezer for up to three weeks. For freezing, roll the dough out into sheets and wrap them in plastic film.
6. Roll out the top crust large enough to cut a 12-inch circle.
Transfer the pie filling mixture to the pie shell. Moisten the border of the bottom crust by brushing it lightly with water and place the top crust over the filling. Trim the overhang of the top crust so that there is only 1/2-inch of overhand. Tuck the overhand under the bottom crust boarder and press down all around to seal it. Crimp the border using a fork or your fingers and make about 5 evenly spaced 2-inch slashes starting about 1 inch from the center of the pie and radiating toward the edge. Cover the pie loosely with plastic wrap and refrigerate it for 1 hour before baking. This will chill and relax the pastry, preventing shrinking.


[…] together until some crumbs are formed and the rest is ‘lumpy’. Joy The Baker’s Buttermilk Pie Crust is an example of […]